Adding multilingual support to your Windows Phone application using the Multilingual App Toolkit
Aug 19, 2013 · 6 minute read · CommentsWindows Phone
Windows Phone Store is currently available in 191 countries. This allows your application to have a global customer reach. This also means a lot of customer diversity. Language is one of these differences. Building and application that can target multiple languages can help provide a great user experience for as many users around the world as possible.
The Multilingual App Toolkit helps you in this process. It allows you to easily localize your app, either by yourself or using Microsoft Translator. You can also share this translation files with someone and then import them into your project. You can also import these translation files into a Windows 8 application.
Prerequisites
In order to user the Multilingual App Toolkit your application must be built or modified in order to support localization. This means that all your localized resources are separated from the code. MSDN has a great article on How to build a localized app for Windows Phone.
Multilingual App Toolkit
You can download the Multilingual App Toolkit here: Multilingual App Toolkit for Visual Studio 2012
Example application
For this article we’ll create a simple Hello world! application based on the Windows Phone App template. It is a simple page with a Button and a TextBlock which displays a message when you tap the button.

This is the code for the MainPage.xaml:
<StackPanel x:Name="TitlePanel" Grid.Row="0" Margin="12,17,0,28">
    <TextBlock Text="{Binding Path=LocalizedResources.ApplicationTitle, Source={StaticResource LocalizedStrings}}" Style="{StaticResource PhoneTextNormalStyle}" Margin="12,0"/>
    <TextBlock Text="{Binding Path=LocalizedResources.MainPageName, Source={StaticResource LocalizedStrings}}" Margin="9,-7,0,0" Style="{StaticResource PhoneTextTitle1Style}"/>
</StackPanel>

<!--ContentPanel - place additional content here-->
<Grid x:Name="ContentPanel" Grid.Row="1" Margin="12,0,12,0">
    <Button Content="{Binding Path=LocalizedResources.ButtonText, Source={StaticResource LocalizedStrings}}" HorizontalAlignment="Center" VerticalAlignment="Top" Click="Button_Click"/>
    <TextBlock x:Name="tbMessage" HorizontalAlignment="Center" VerticalAlignment="Center" FontSize="72" />
</Grid>
And the code behind:
private void Button_Click(object sender, RoutedEventArgs e)
{
    tbMessage.Text = AppResources.HelloMessage;
}
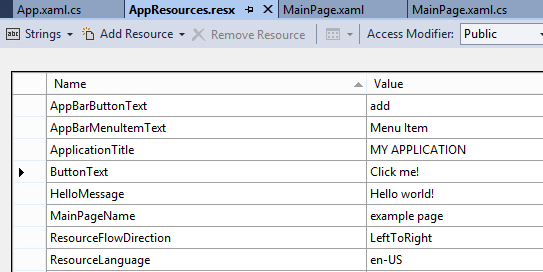
A few entries were added to the AppResources.resx. It looks like this:
Enable the Multilingual App Toolkit
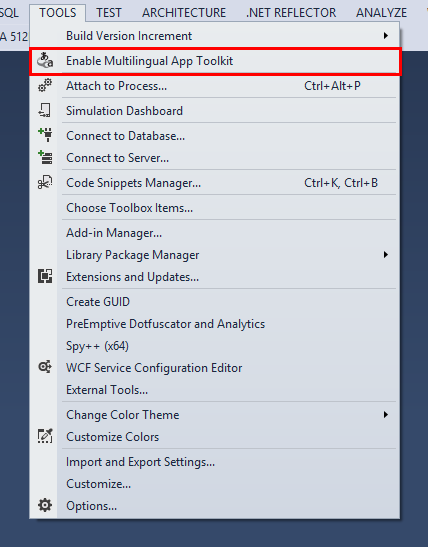
To begin using the Multilingual App Toolkit you must first enable it. Open your project in Visual Studio, open Tools menu and select Enable Multilingual App Toolkit.
Add new languages
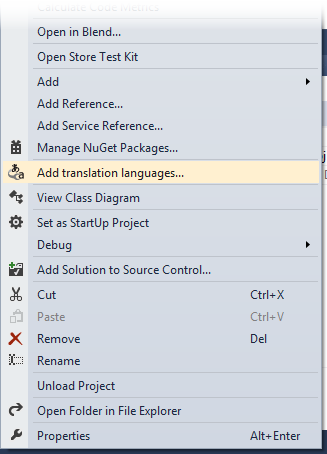
To add a new language, go to the Solution Explorer and right-click your project. Select Add translation languages….
In the Translation Languages window select the language(s) you want to add. In this example we’ll add Portuguese localization to our application.
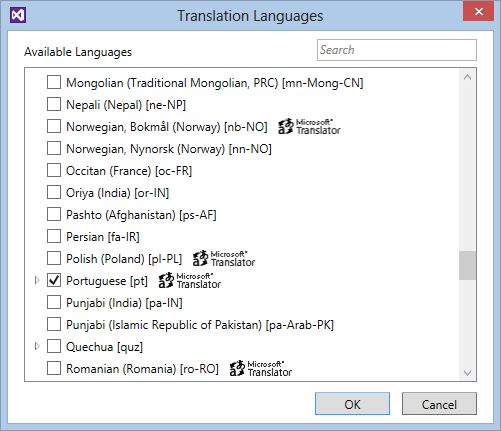
A new file called AppResources.
Multilingual Editor tool
Double click the file that was created in the previous step. The Multilingual Editor window will open. You can use this tool to translate your application in multiple ways:
Translate your application by yourself
If you happen to speak the language you’re adding to your application, you can translate it all by yourself. Simply go through the list of strings at the bottom and type the translation for each item in the Translation field. Notice that each string has an icon to its left. This represents the state of each translation. You can use this to, for example, mark some string for later review. This feature is really useful when sharing translation files with other people.
Translate using Microsoft Translator Service
The Microsoft Tranlator service can also be used to help you in your localization process, either by providing suggestions for each translation or by completely replacing a string with its translation. To use the Microsoft Translator service, simply select the string you want to translate and click on the options in the toolbar.
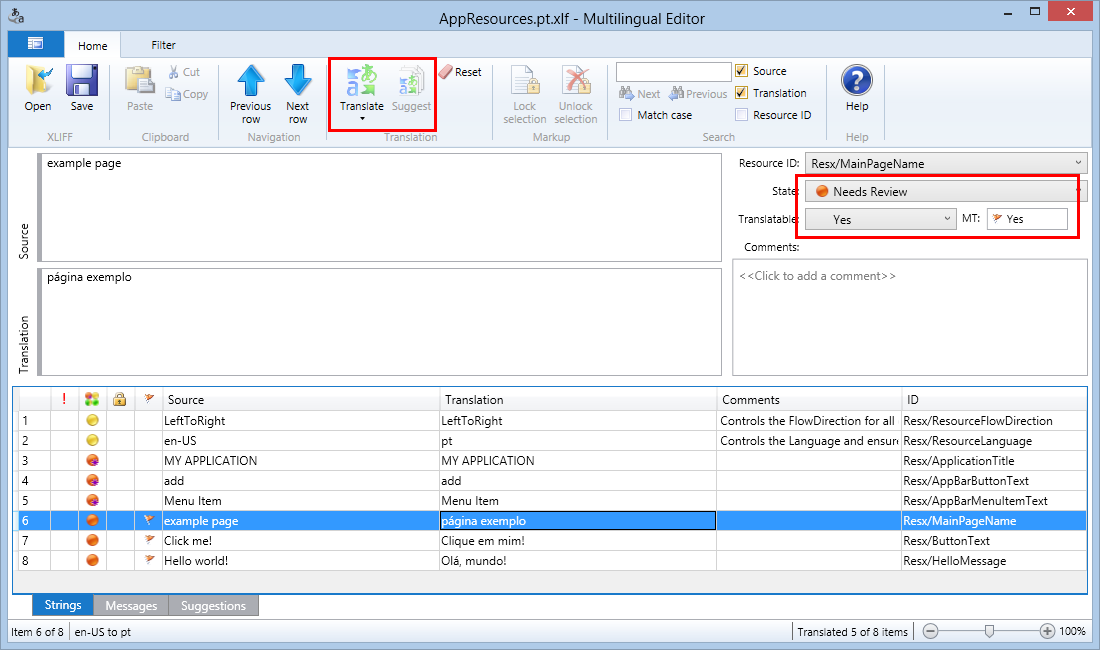
As you may know, machine translation is not perfect because of the complexity of the human language. When you use this service to translate a string (or a group of strings), you’ll notice that they are flagged as being MTed (Machine Translated) and that their state is set to Needs Review. You can later accept this translation or make changes to suit your style.
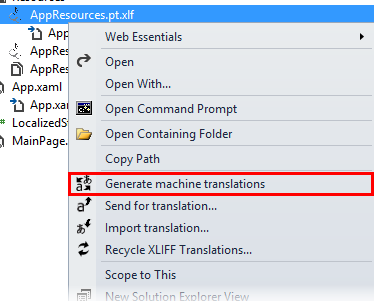
To translate all the strings in a file using the Microsoft Translator service, click the arrow bellow the Translate button and select Translate All. You can also right click the .xlf file in the Solution Explorer and select Generate machine translations.
Share a translation files
Sometimes you may want to add support for a language that you may not know very well. In this case you can share the XLIFF file with another person (or service) so that they can translate it for you. XLIFF is a format that is supported by a lot of applications. You can also open this type of files using the Multilingual App Toolkit. It can be used standalone. Just look for it in your Start Menu.
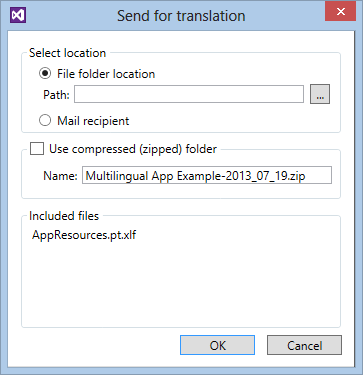
Exporting a file for translation
Right click the file you want to export and select Send for translation…. Select File folder location if you want to save the .xlf file to a local folder or select Mail recipient if you want to send the .xlf by email. Select Use compressed (zipped) folder if you want to compress the file before saving or sending.
“Note that you can export multiple files at once. Select the files you want to export in the Solution Explorer while pressing Ctrl and follow the steps above.”
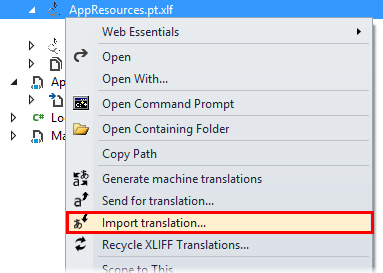
Import a translation file
Right click the matching .xlf file in your solution and select Import translation…. If the languages for each file are not the same, the importing will fail.
Test a localized application
You can test a different language by changing the display language on your phone (or emulator). Check this article for more information: How to test a localized app for Windows Phone
In alternative, you can force your application to use a different language by adding the following line to the beginning of the App constructor in App.xaml.cs:
using System.Globalization;
using System.Threading;
...

Thread.CurrentThread.CurrentUICulture = new CultureInfo("pt");
Replace the pt string with the language code you want to test.
After translating our example application to Portuguese, this is what it looks like:

Final words
As said before, by having an app in the Windows Phone Store you can reach a lot of different cultures. English may be a globally spoken language, but if you can adapt your application to better target a specific culture, you will be providing your users a better experience. And if a user likes your application, he will certainly recommend it to other people, giving you a larger user base. Tools like the Multilingual App Toolkit can help you achieve this.
This article was originally created for the Nokia Developer Wiki.
This is the official Nokia wiki, dedicated to development on Nokia platforms. You can find a lot of great articles, code examples and many other resources. Be sure to check it!